 Slack
Slack GitHub
 Twitter
Documentation
About Kubeapps
Tutorials
- Get Started with Kubeapps
- Using an OIDC provider
- Managing Carvel packages
- Managing Flux packages
- Kubeapps on TKG
How-to guides
- Using the dashboard
- Access Control
- Basic Form Support
- Custon App View Support
- Custom Form Component Support
- Multi-cluster Support
- Offline installation
- Private Package Repository
- Syncing Package Repositories
- Using an OIDC provider with Pinniped
Background
Reference
About the project
Step 3: Add Application Repositories to Kubeapps 
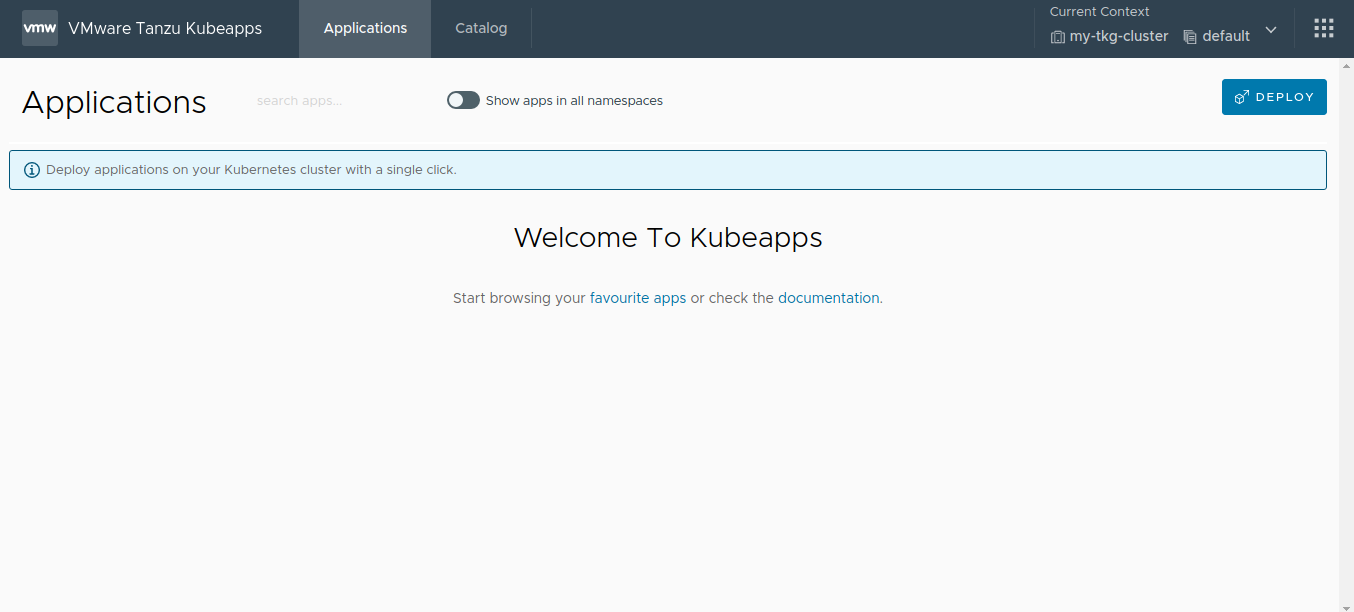
Once Kubeapps is up and running on the VMware Tanzu™ Kubernetes Grid™ cluster, the next step is to add application repositories to it. This could include public repositories, private repositories or both.
The general procedure to add any repository is described below:
Log in to Kubeapps as described in the previous step.
Click the menu button in the top right corner (dotted square).
Click the Package Repositories button.
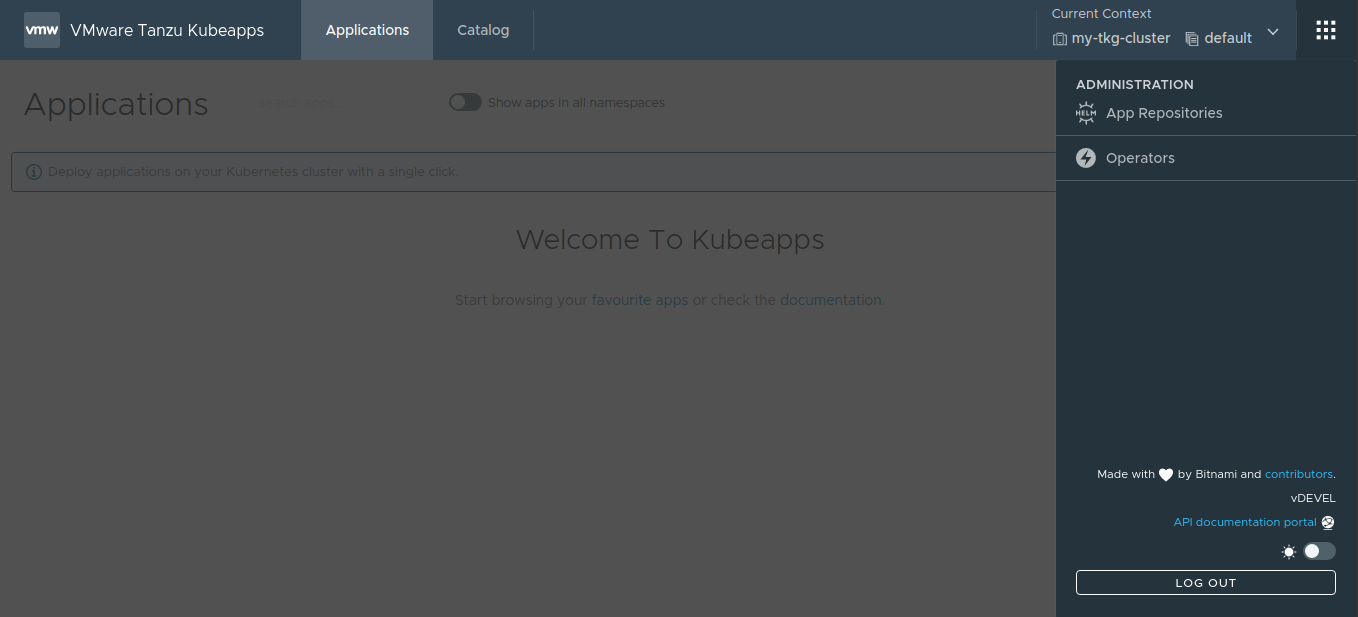
Add a new repository by clicking the Add Package Repository button.
NOTE: If no repositories were specified in the
initialReposchart parameter during the Kubeapps installation, no repositories will be shown on the Application Repositories page.
- Fill the Add a Package Repository form using the guidelines below:
The Name field is a friendly display name for the repository.
The URL field specifies the endpoint of the repository. This endpoint might require different forms of authentication, such as
None,Basic Auth(username and password),Bearer Token(a token) or anotherCustommechanism.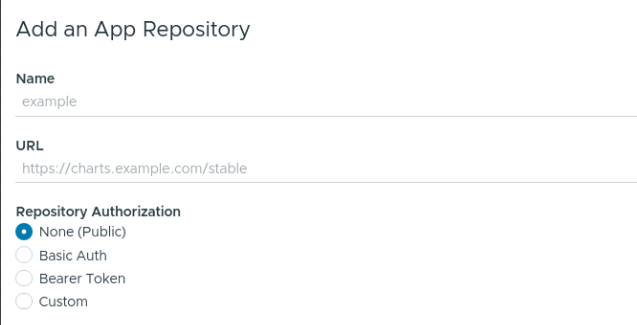
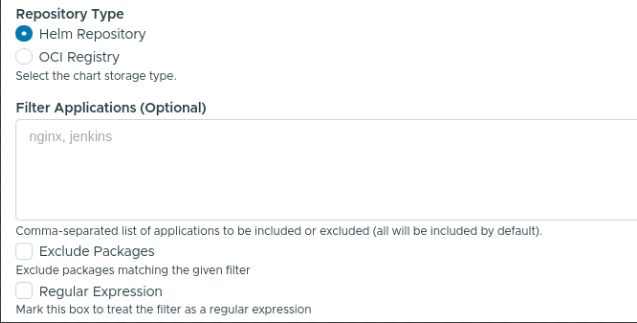
The Repository Type field specifies the type of repository. Currently, Kubeapps supports both Helm repositories and OCI registries. For the latter, it is necessary to also manually specify the list of artifacts to fetch in the List of Repositories field (as there is no index yet). Additionally, artifacts can be excluded using regular expressions if required.
The Associate Docker Registry field specifies an
imagePullSecretfor images that are to be pulled from the private registry. It is possible to create a fresh secret or choose an existing one.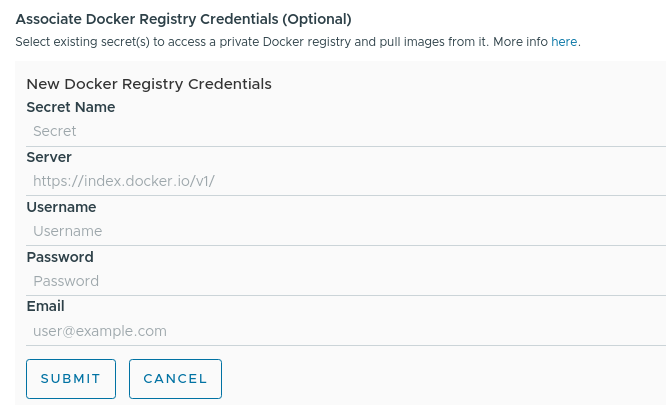
The Custom CA Certificate field specifies a CA certificate to use (with an option to skip the TLS verification if required).
The Custom Sync Job field specifies the synchronization template to use when periodically pulling the latest changes from the application repository.
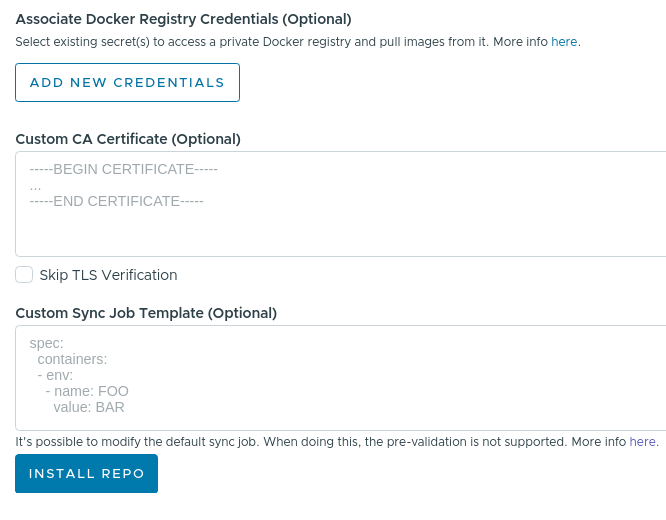
- Click the Install Repo button to finish the process and add the repository to Kubeapps.
Retrieving the catalog from the repository will take a few minutes. Once complete, the contents of the repository will become available in Kubeapps. To check the progress of the synchronization task, use the following command, replacing REPOSITORY-NAME with the name configured above:
kubectl logs -n kubeapps -l apprepositories.kubeapps.com/repo-name=REPOSITORY-NAME
The following sections demonstrate the process of filling the Add a Package Repository form for two specific examples: the VMware Marketplace™ and the VMware Tanzu™ Application Catalog™ for Tanzu™ Advanced.
Add the VMware Marketplace™ 
NOTE: This repository is currently under heavy development. Therefore, the URL used below is subject to change.
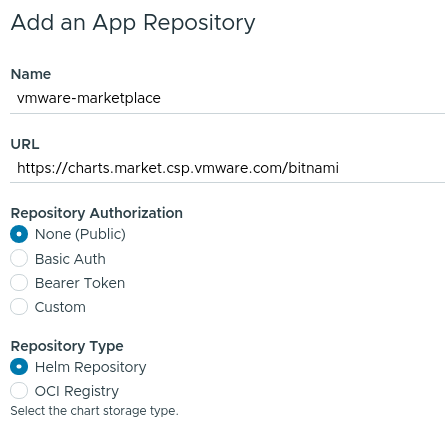
The public content from the VMware Marketplace™ repository can be retrieved at https://charts.market.csp.vmware.com/bitnami. Since this is a public repository, it is only necessary to configure the following values in the Add a Package Repository form:
- Name: Add a descriptive name, such as
vmware-marketplace. - URL: Use the endpoint URL
https://charts.market.csp.vmware.com/bitnami.
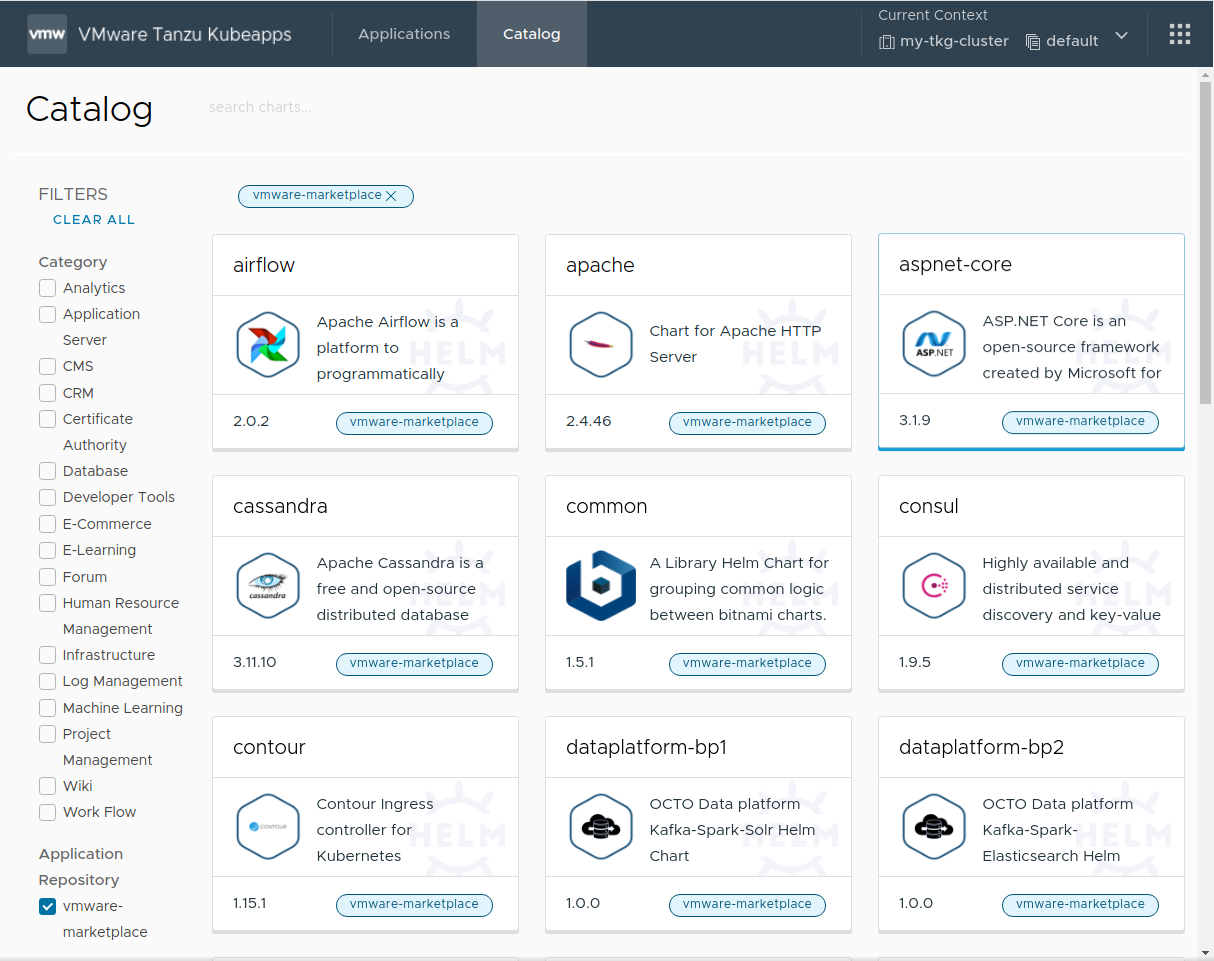
Once complete, the public catalog will be visible in Kubeapps, as shown below:
Add the VMware Tanzu™ Application Catalog™ for Tanzu™ Advanced 
The private content from the VMware Tanzu™ Application Catalog™ for Tanzu™ Advanced repository can be retrieved at https://registry.pivotal.io/tac-for-tanzu-advanced/charts/. Since this is a private OCI registry, there are two key differences to note in the process:
- It is necessary to specify repository authentication credentials using the
Basic Authoption and defining the correct username and password. If you do not have these credentials, please reach out to your VMware sales representative . - As this is an OCI registry, it is necessary to manually add the list of artifacts to be retrieved in the List of Repositories field.
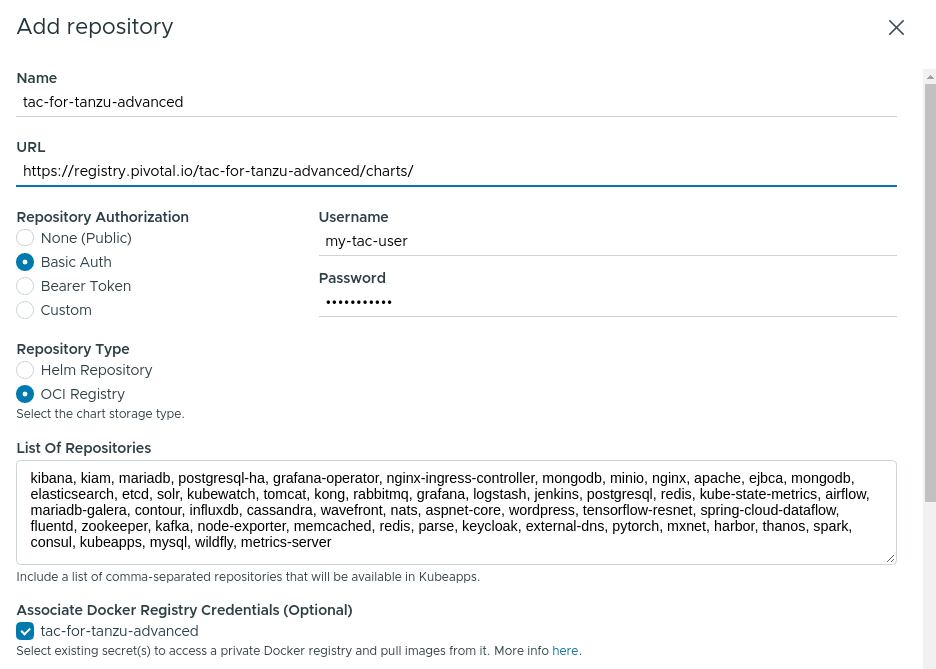
Configure the following values in the Add Repository form:
- Name: Add a descriptive name, such as
tac-for-tanzu-advanced. - URL: Use the endpoint URL
https://registry.pivotal.io/tac-for-tanzu-advanced/charts/. - Repository Authorization: Set the value to
Basic Auth.- Enter your VMware Tanzu™ Application Catalog™ for Tanzu™ Advanced username and token in the Username and Password fields respectively.
- Repository Type: Set the value to
OCI Registry. - List of Repositories: Set the value to
kibana, kiam, mariadb, postgresql-ha, grafana-operator, nginx-ingress-controller, mongodb, minio, nginx, apache, ejbca, mongodb, elasticsearch, etcd, solr, kubewatch, tomcat, kong, rabbitmq, grafana, logstash, jenkins, postgresql, redis, kube-state-metrics, airflow, mariadb-galera, contour, influxdb, cassandra, wavefront, nats, aspnet-core, wordpress, tensorflow-resnet, spring-cloud-dataflow, fluentd, zookeeper, kafka, node-exporter, memcached, redis, parse, keycloak, external-dns, pytorch, mxnet, harbor, thanos, spark, consul, kubeapps, mysql, wildfly, metrics-server. - Associate Docker Registry Credentials:
- Secret Name: Set the value to
tac-for-tanzu-advanced. - Server: Set the value to
https://registry.pivotal.io/tac-for-tanzu-advanced/. - Username: Set the value to your VMware Tanzu™ Application Catalog™ for Tanzu™ Advanced username.
- Password: Set the value to your VMware Tanzu™ Application Catalog™ for Tanzu™ Advanced token.
- Click Submit to create and save the secret.
- Secret Name: Set the value to
Once the secret has been created, it will appear in the list of Associate Docker Registry Credentials. Tick the checkbox for this newly-created tac-for-tanzu-advanced registry credential.
NOTE: To obtain the most current list of repositories, log in to the registry using the
orastool and run the command below:oras pull registry.pivotal.io/tac-for-tanzu-advanced/index:latest -a && cat asset-index.json | jq -r '.charts | map(.name) | join(",")'
Once complete, the private catalog will be visible in Kubeapps, as shown below:
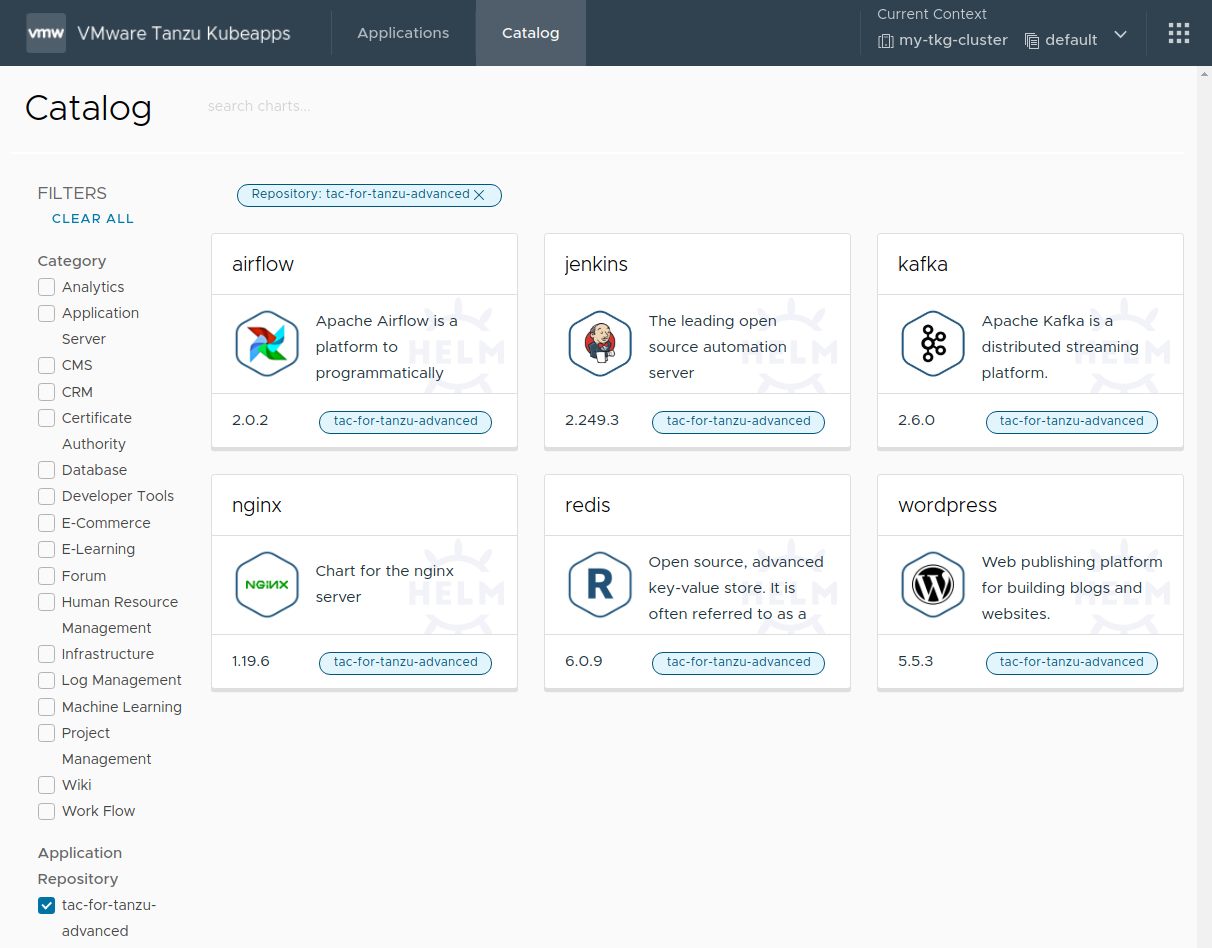
At the end of this step, the Kubeapps installation is configured with one or more application repositories. The next step is to start using Kubeapps .
Appendix: Role-Based Access Control (RBAC) in Application Repositories 
A Kubeapps application repository can be created by anyone with the required RBAC privileges for that namespace.
Users with cluster-wide RBAC privileges for creating application repositories can still create an application repository whose charts will be available to users in all namespaces by selecting All Namespaces when creating the repository.
To grant a user permission to create AppRepository objects in a specific namespace, create RoleBinding objects associating apprepositories-read and apprepositories-write roles with that user, as shown below. Replace the USERNAME and CUSTOM-NAMESPACE placeholders with the corresponding username and namespace name.
TIP: If users only require permissions to deploy charts from application repositories in a specific namespace, it is sufficient to create only the
apprepositories-readRoleBindingobject.
# Grant the user USERNAME read apprepositories permissions on the CUSTOM-NAMESPACE namespace
kubectl -n CUSTOM-NAMESPACE create rolebinding USERNAME-apprepositories-read \
    --user USERNAME
    --clusterrole kubeapps:$KUBEAPPS_NAMESPACE:apprepositories-read
# Grant the user USERNAME write apprepositories permissions on the CUSTOM-NAMESPACE namespace
kubectl -n CUSTOM-NAMESPACE create rolebinding USERNAME-apprepositories-write \
    --user USERNAME \
    --clusterrole kubeapps:$KUBEAPPS_NAMESPACE:apprepositories-write